In the realm of mushroom cultivation, grain spawn goes beyond being a mere puzzle piece within the mycelium assembly – it serves as the entire toolkit, if not the workshop itself! It’s the unsung hero working behind the scenes in our mushroom stories, quietly preparing the stage for the spectacular flourishing of fungi that we all adore. Creating grain spawn is a phase of mushroom cultivation that can involve the entire family and is something you must learn if you want to improve your mushroom-growing skills. The procedure for crafting grain spawn remains nearly identical, regardless of the specific mushroom variety you’re aiming to grow.
The primary purpose of grain spawn is to create a controlled environment where your selected mycelium can thrive and proliferate. This growth happens before you allow it to spread within your fruiting (bulk) substrate. For this endeavor, your grain must be completely sterile. The most convenient method for achieving sterility as a home cultivator involves utilizing a high-quality pressure cooker. Let’s start from the beginning and dive headfirst into the world of grain spawn!
What is Grain Spawn Exactly?
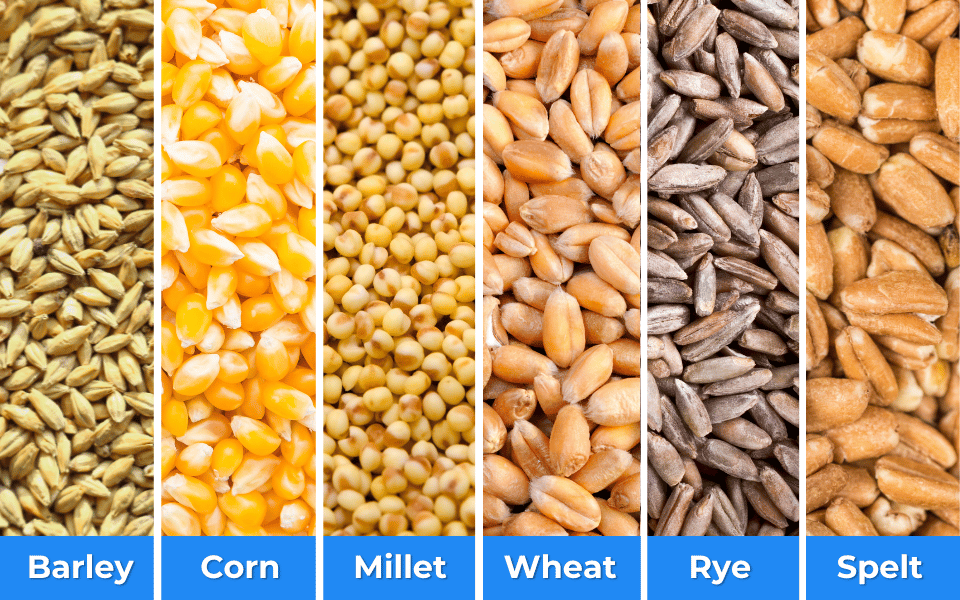
Grain spawn stands as a widely adopted medium for cultivating mushrooms. It is created by sterilizing grains like rye, wheat, or millet, followed by the introduction of mushroom spores or mycelium. Over time, the mycelium proliferates and encompasses the grains, forming a network of fungal cells that can subsequently be utilized to inoculate larger substrates such as sawdust, straw, or wood chips.
This method of using grain spawn has gained popularity in mushroom cultivation due to its comparative ease and cost-effectiveness in contrast to alternative techniques. The grains offer a nourishing foundation for mycelium growth and maturation, with the sterilization process acting as a safeguard against contamination from other microorganisms. Grain spawn proves versatile in nurturing a variety of mushroom species.
How To Make Mushroom Grain Spawn
Grain spawn is the cherished offspring of your mushroom venture, acting as a vital middleman between you and the fungi. This process involves the fusion of sterilized grains with mycelium, the vegetative component of a fungus. Together, they forge a captivating symbiotic relationship, with the mycelium embracing the grains, orchestrating colonization through its intricate network of thread-like cells.
Making Mushroom Grain Spawn In Jars
Let’s break down the process into 5 easy to follow steps that will teach you how to make mushroom grain spawn on your own:
Preparation
The grain will act as the prime nutritional resource for your mycelium. Therefore, handpick it and check if everything is alright.
Soak the Grain
Thoroughly cleanse and soak the grains. To soak the grains, simply place them in a bucket or bowl, cover them with water, and allow them to sit for a span of 12 to 24 hours. Be mindful not to exceed the 24-hour mark, as extended soaking might lead to sprouting. Depending on the type of grain utilized, its volume should increase by approximately 2 to 3 times.
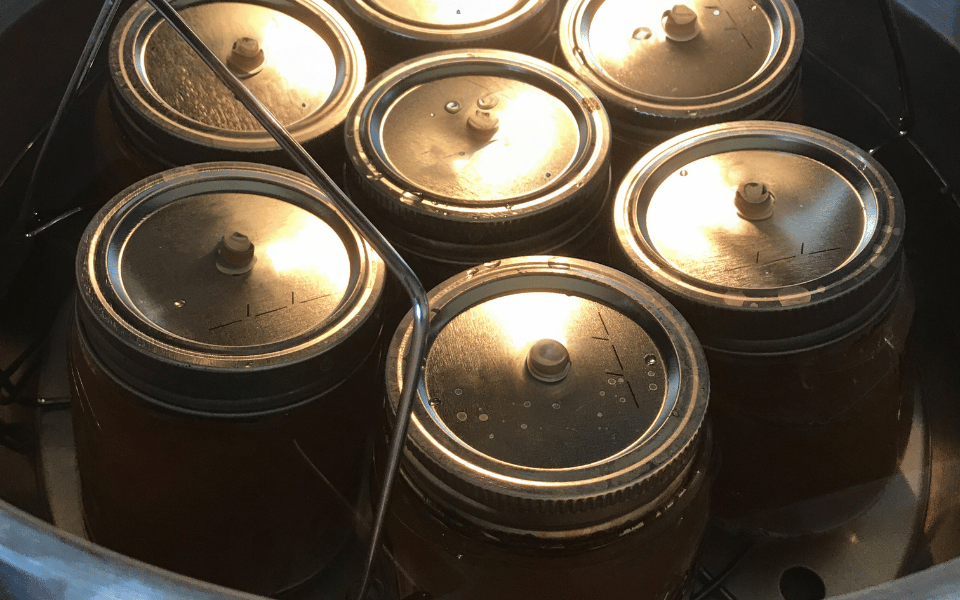
Modify the Jar Lids
You’ll need:
- 12 glass mason jars of approximately 500ml (1/2 quart)
- Metal lids for the jars
- A screwdriver or a large nail, a hammer, and a wooden block
- A small quantity of polyfill
These unique lids are designed to enable you to inoculate the sterilized grain without the need for a laminar flow hood. Simply drill two holes on the lid’s top surface, a bigger one in the center while the other smaller one should be closer to the edge. Once the smaller hole is drilled, apply a small amount of high-temperature silicone sealant over it and allow it to dry completely. This hole will be your inoculation port. Next, insert a small amount of polyfill found in the pillows into the bigger hole. This will provide the mycelium with all the necessary breathing room as it navigates its way through the grains.
Cooking
Once the grain is nice and hydrated gently simmer them on the stovetop. This step serves to fully hydrate the grains and render them tender, making them favorable for the fungi culture. Simply simmer the soaked grains on the stove for approximately 15 minutes. It’s crucial not to overcook them, as extended cooking can lead to grain cracking and the development of mushy grain spawn. Once cooked, place the grains in a sink with a drain cover. Over the course of about an hour, the grains will drain naturally. After this, you can proceed to fill your jars.
Sterilization
Once you’ve filled your jars with grain it’s time to sterilize it. Sterilization is a necessary step that will eliminate all undesirable contaminants present in the grains that could potentially outcompete your mushroom culture. Therefore, investing in a good pressure cooker is always a good idea in the world of mushroom cultivation.
After filling the jars, envelop the lids with aluminum foil to prevent water from dripping into them. Subsequently, proceed to pressure sterilize the jars for approximately 90 minutes at 15 psi.
Inoculation
Once the sterilization is finished and the grain cooled down to room temperature, it’s time to inoculate the jars. Clean the jar lid with rubbing alcohol, take your liquid culture syringe, and flame-sterilize the needle every time before you insert it through the silicone seal on the injection port. This process should be done under a laminar flow hood or a glove box for an extra layer of security.
Colonization
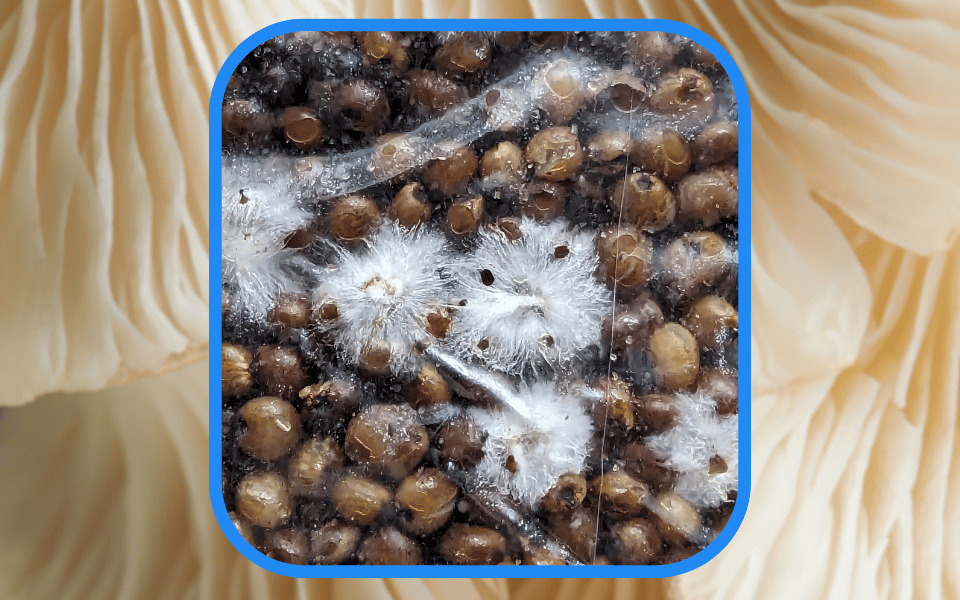
Once the jars have been inoculated, place them in a warm, dim, and adequately humid setting for a span of several days. Occasionally monitor their progress to observe mycelium growth and ensure no contamination has emerged.
If the jar is contaminated you will see green or brown discoloration on the spots where mold is growing. This could mean that the jars weren’t sterilized properly or that the culture is compromised. Within 1 to 2 weeks, your jars will be completely colonized. Good job, you just learned how to make mushroom grain spawn!
How to Make Mushroom Grain Spawn In Bags
Making mushroom grain spawn in bags is yet another simple and straightforward method. To start you will need sterilized grains, water, sealing bags, and a pressure cooker. An atmospheric steam sterilizer can also be used if you possess more advanced equipment.
Preparation
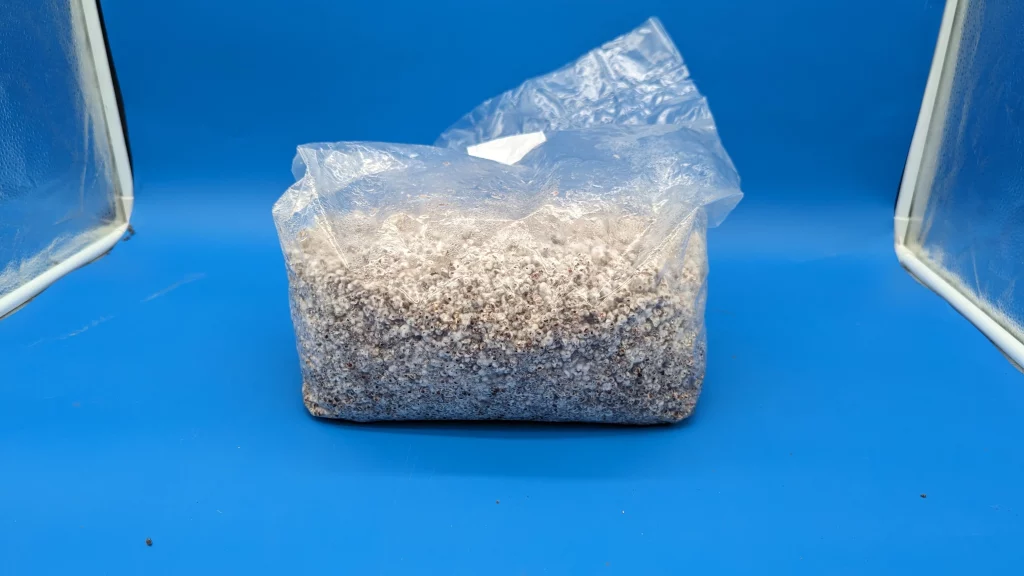
Measure out 760 grams (1.6 lbs) of sterilized grains of your choice. In a clean and sterile environment add 650 grams (1.4 lbs) of water to the grains in a suitable sealing bag. You can learn how to make your own sterilized grain here.
Mix and Seal
Thoroughly mix the grains and water in the bag to ensure even moisture distribution. Seal the bag, leaving some room at the top to allow for expansion during sterilization.
Sterilization
Load the sealed bag into a pressure cooker or atmospheric steam sterilizer. Follow the manufacturer’s instructions for sterilization. If you are using a pressure cooker simply sterilize the grain at 15 psi for 90 minutes.
Inoculation
Allow the bag to cool down to room temperature after sterilization. Make sure that the environment you are working in is as clean and sterile as possible. Preferably work under a laminar flow hood. If you are using regular grow bags with an injection site simply take your liquid culture and inject through the site. Make sure to flame sterilize the needle after every injection to minimize the risk of contamination.
Check our article on how to inoculate sterilized grain bags.
Colonization
The colonization process is the same as with the jar method. Place your bags in a warm and dark place away from direct sunlight, and wait for a week or two until your bags are fully colonized.
Time To Use The Grain Spawn
Once the mycelium has fully colonized your grain spawn, it is ready for use in inoculating mushroom substrates like sawdust, straw, or wood chips. Gently shake your jars to break the grain spawn apart.
For the next step it’s necessary to be in a clean and sterile environment, thus working under a laminar flow hood is the best option. You want to introduce your components in the ratio of 1 part grain spawn to 5 parts substrate. Place your mix into the bag, and clean the air pocket at the top. Vigorously shake your inoculated substrate also known as the “Fruiting Block.” Relax and observe the fruits of your hard work as the substrate is getting slowly colonized by the mycelium.
Final Word
As you can see preparing the grain spawn is pretty straightforward. It indeed is a delicate process requiring special attention to hygiene and sterility. However, armed with the appropriate equipment and knowledge, you can successfully create your own grain spawn and cultivate mushrooms in the comfort of your home!

Very interesting points you have mentioned, thank you for posting.Raise your business
Can you be more specific about the content of your article? After reading it, I still have some doubts. Hope you can help me.
I’ve learned more from your blog than I have from expensive courses. Thanks for making this information accessible!
Minecraft Redeem Code Generator
Your article helped me a lot, is there any more related content? Thanks!
Pingback: Mushroom Spawn Bags 101 - Spawn Magic