Checkout our video on Low Tech Method to Easily Grow Oyster Mushrooms at Home
Intro:
By far the easiest mushroom to grow at home is the oyster mushroom. It’s popular as a kit, kits are ready to fruit once holes are cut into the bag and placed in a humid location without much airflow, that would otherwise dry it out. Small kits are highly commercialized, and available at walmart, home depot and other similar stores.
Online bigger kits are available and often more productive: We offer our own ready to fruit kits on our shop.
However, if you’d like to grow oyster mushrooms in a more economical way, on a sizable scale, kits can be too expensive unless you have a good cheap bulk source of ready to fruit blocks.
A good option to grow at home is to use wheat straw; it can be used to grow large quantities of oyster mushrooms without any additional supplementation and without any heat pasteurization or clean work. Heat pasteurization can often be difficult to manage and dangerous, and clean room work can be an expensive barrier of entry to new mushroom growers.
Materials Needed To Grow Oyster Mushrooms on Straw
1. Wheat Straw – ideally shredded. Wheat straw is often smaller and easier to shred and manipulate than barley or other straws, but these will work as well. Pre-shredded wheat straw is often available at Tractor Supply, but it is much more expensive than baled straw.
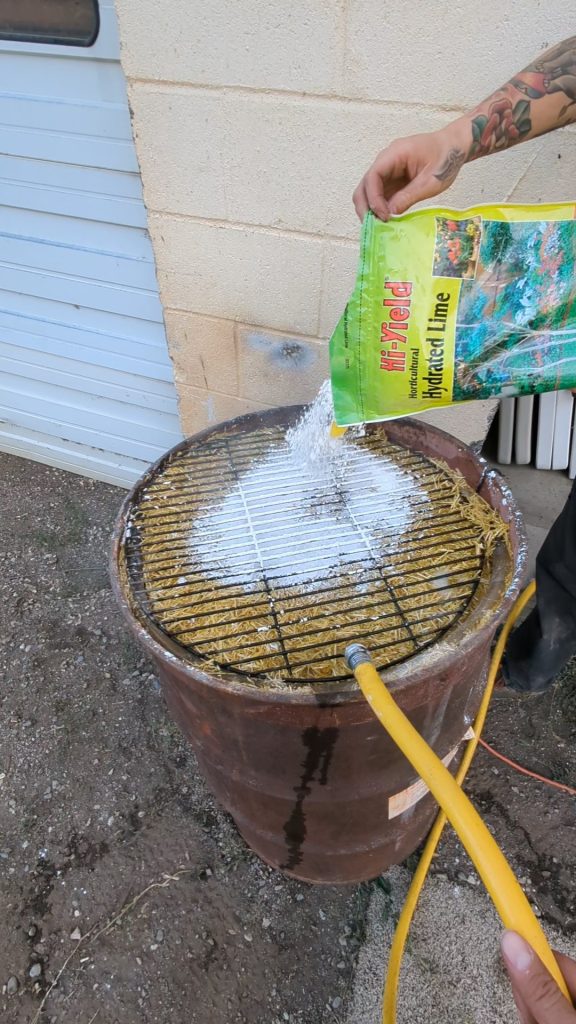
2. Hi Yield Hydrated Lime – this is a pasteurizing agent and is often available at garden supply stores. Other products also called lime will not work if they are not low magnesium calcium hydroxide.
3. Water – This, combined with the hydrated lime, will hydrate and pasteurize the straw, getting it ready to be inoculated with oyster mushroom spawn, or a kit (either before or after the kit has fruited; so long as it looks healthy)
4. Soaking & Draining Container – this is to let the straw hydrate and pasteurize in the hydrated lime solution. as welll as let it drain once fully hydrated which takes approximately 24 hours to soak, and an hour or two to fully drain.
5. Bag or Container for Colonization – This could be 5 gallon buckets with holes drilled in them, large durable plastic bags, or anything else that can hold a few pounds of hydrated straw.
Steps to Grow Oyster Mushrooms on Straw
1. Get shredded wheat straw – this can either be purchased at places like tractor supply or you can buy bales of straw from a farmer and shred them yourself. This can be extremely messy, and isn’t absolutely needed, but shredding the straw significantly increases yields and makes for a better more compact substrate that is less likely to have problems and colonizes faster.
2. Add and compress the shredded wheat straw into your soaking container. Make sure your container has a means to drain or is small enough that you can easily pour off the water without the straw going with it. You will want to let the straw drain until no more water comes off of it, so make sure it has a sieve or a good drain on the bottom. You will also want something that can hold down the straw so it is fully submerged during the soak.
3. Dissolve hydrated lime in water. Add enough of this solution to completely submerge the straw, again, having something to weight down the straw is a good idea to ensure all of the straw gets properly hydrated and pasteurized. Exact amounts of lime is difficult to provide but 330 grams per 50 gallons of water is the generally recommended. More is often better as excess will be poured off with the solution. That said, as long as the solution is strongly basic and remains strongly basic throughout the soaking process it will work well.
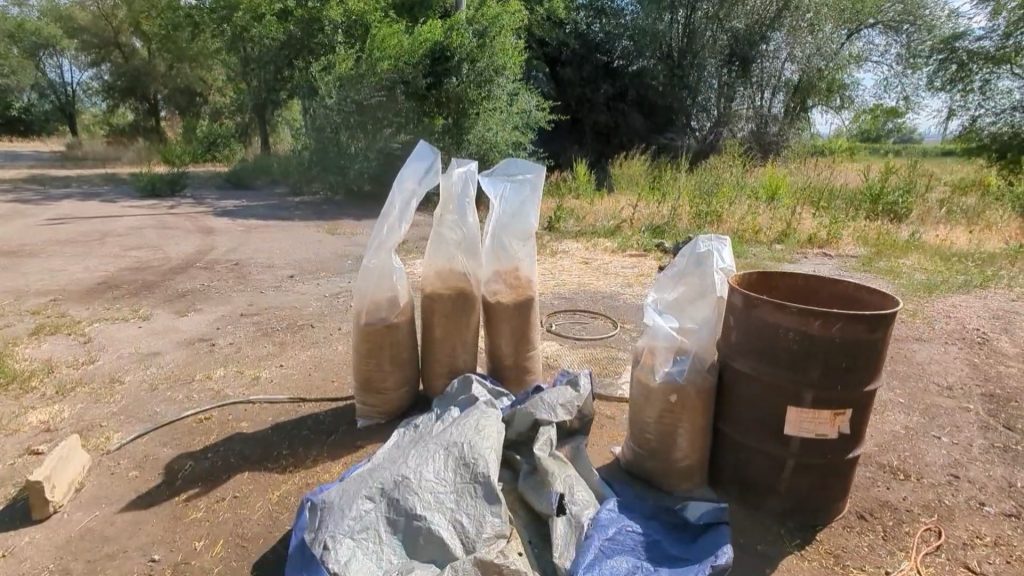
When we do it, we use a 55 gallon drum, and use a pump at the bottom of the barrel to recirculate the water and lime mixture.
There is a circular hose at the top with many holes drilled in it to help the lime mix properly by circulating it from top to bottom, and distributing it over the top.
It is better to mix the lime with the water before hand to ensure even mixing unless you have a setup similar to this. The pump also doubles as a means to drain the solution from the 55 gallon drum so that it can be manipulated more easily.
Once the straw has soaked for ~24 hours, and has fully drained, we pour the shredded straw on a clean tarp and add spawn. We’ve used as little as one spent 5 lbs straw oyster log from previous cold pasteurization or a single 3 lbs bag of colonized grain spawn with great success, but we normally use a lot more colonized grain spawn as we are a company primarily focused on grain spawn, so we have a lot of it in excess. Grain spawn is nutritious and adding more will increase yields and decrease contamination rates and lead to faster colonization and fruiting of the substrate.
4. Mix prepared straw with oyster spawn – oyster spawn can be purchased and used, or even smaller grow kits can be used to inoculate straw by breaking them up. A grow kit that has already produced fruits but still looks healthy is a great option so long as it is free of obvious contamination such as other unwanted molds. The better the spawn is broken into small pieces and evenly distributed through out the straw, the faster it will colonize. More grain spawn is better as it will provide faster colonization and additional nutrients but we’ve had great success with 4% grain spawn by weight.
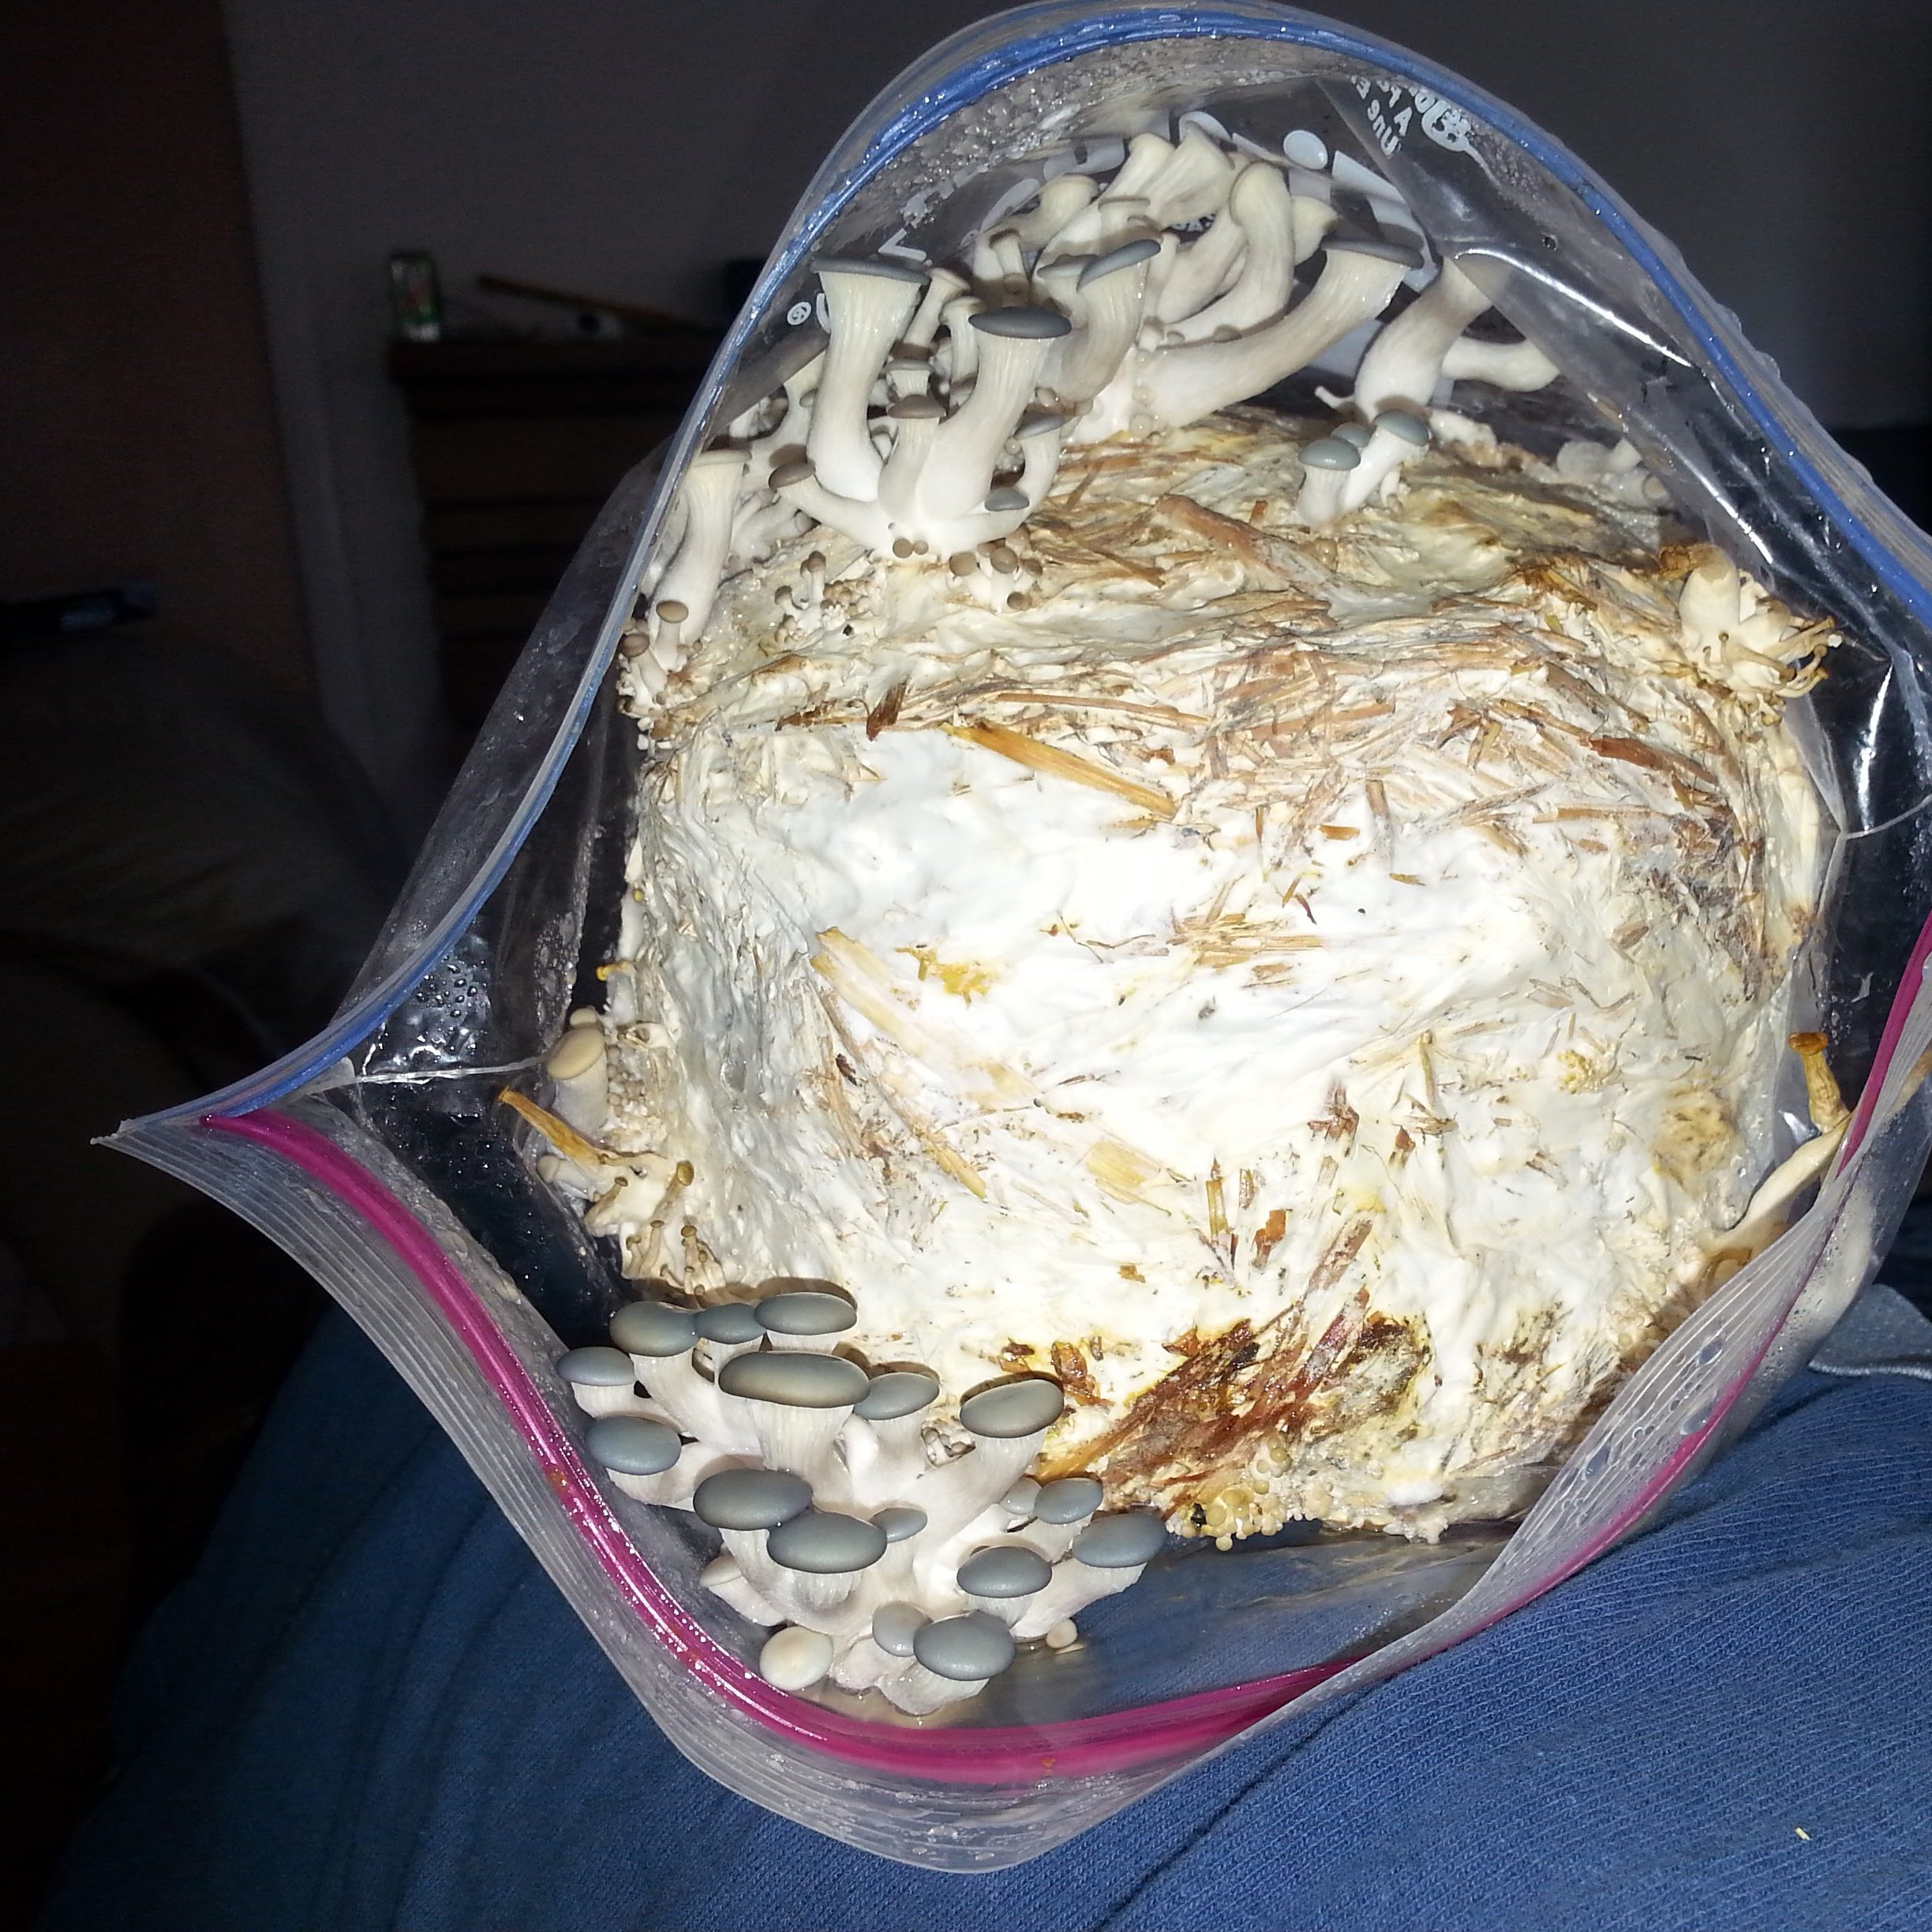
5. Place straw and spawn mix into the container which it will fruit from. This could be anything from large ziplock bags, trash bags, 5 gallon buckets, or even very large polytube bags that are 5+ feet tall and 1ft in diameter.
Here are pictures of two vastly different sizes of oyster straw bags.
6. Ensure container has holes for fruiting, approximately every 5 inches over it’s surface. This is important or the oyster mushroom to properly colonize, and for the mushrooms to grow, as they will grow out of these holes. Hole size can vary a good amount ranging from a dime sized hole up to a cut the entire length of the bag. The colonizing substrate needs to breath in order to colonize without contamination. A filter patch is often less ideal than cutting holes. The holes provide air exchange as well as a location for the mushrooms to grow out of the substrate for harvesting.
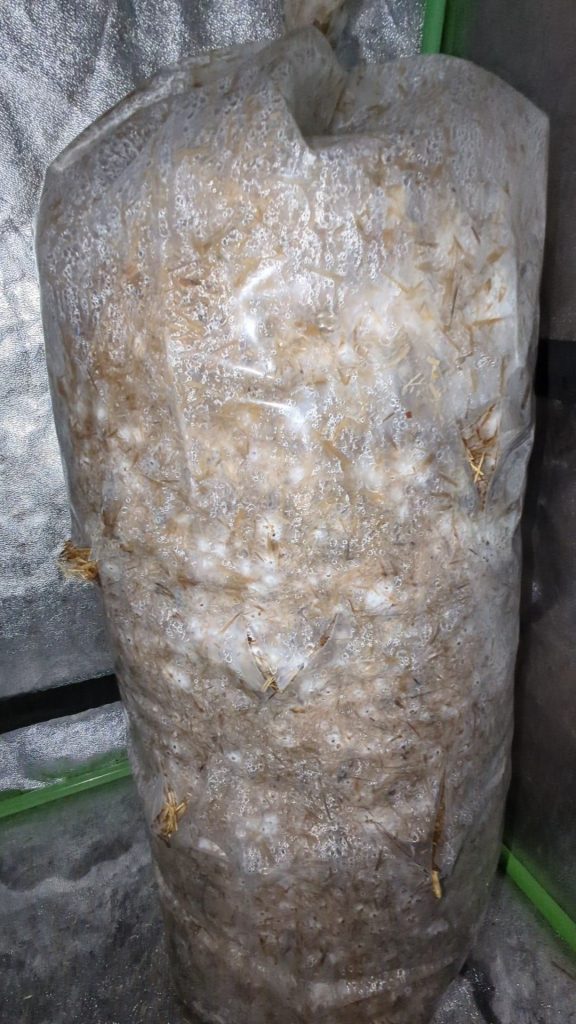
This is a polytube bag approximately 2.5 feet tall and 1 foot in diameter. Various holes were cut to let the oyster mushroom breath as it colonizes. Oyster mushrooms will grow out of these holes once it has consolidated.
Shredded Straw VS Regular Unshredded Straw
One might be tempted to skip using shredded straw and instead opt to use straw straight from the bale in hopes of reducing labor, machinery to shred the straw and to avoid the messy dusty nightmare that is inexorably linked to shredding straw.
But, shredded straw has significant benefits both on yield and density of substrate which translates to being able to grow more mushrooms in the same amount of space.
This study: Simplified and Lower Cost Methods for Culinary-Medicinal Mushrooms Cultivation shows that shredded straw can have 4 times the yield as unshredded straw; going from approximately 40% to 170% biological efficiency. One 50 lbs bale of straw can yield 85 lbs of fresh oyster mushrooms if it is shredded, but may only yield 20 lbs if it regular not shredded straw.


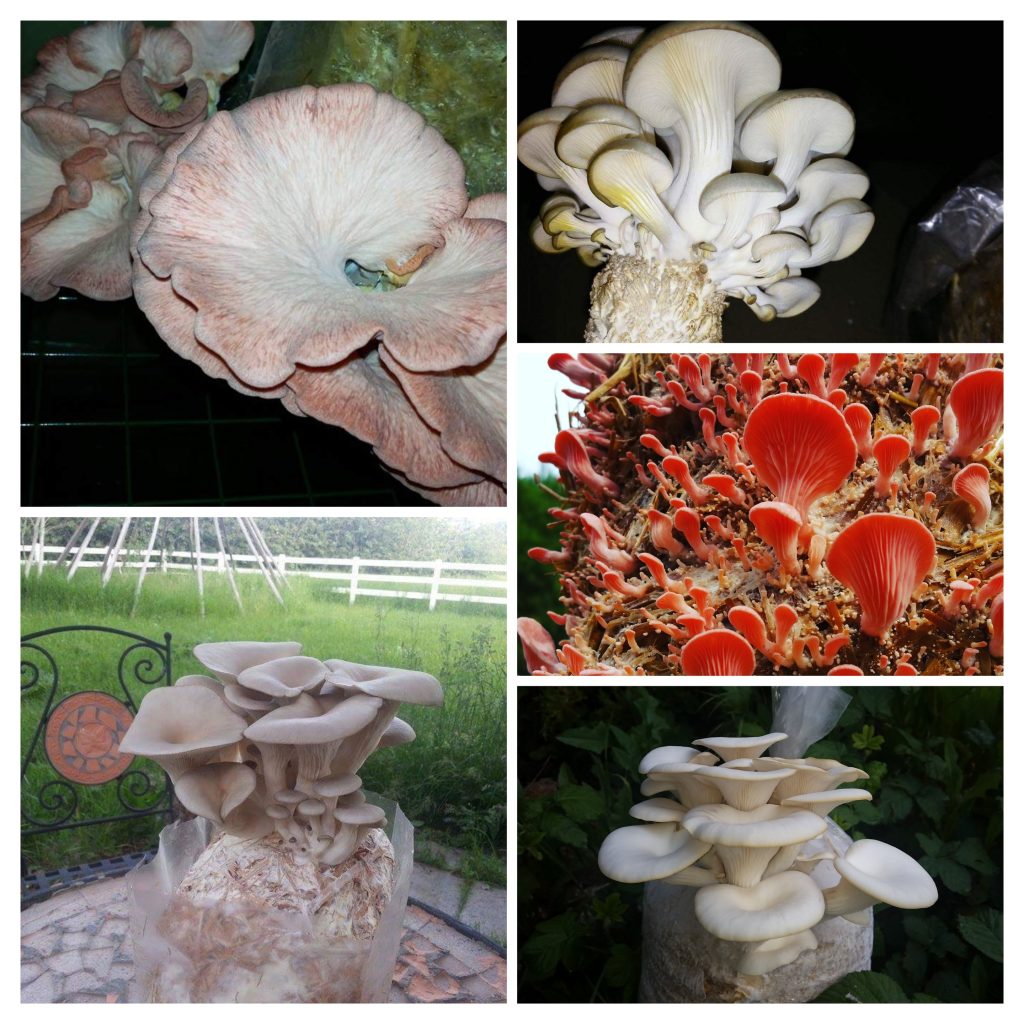
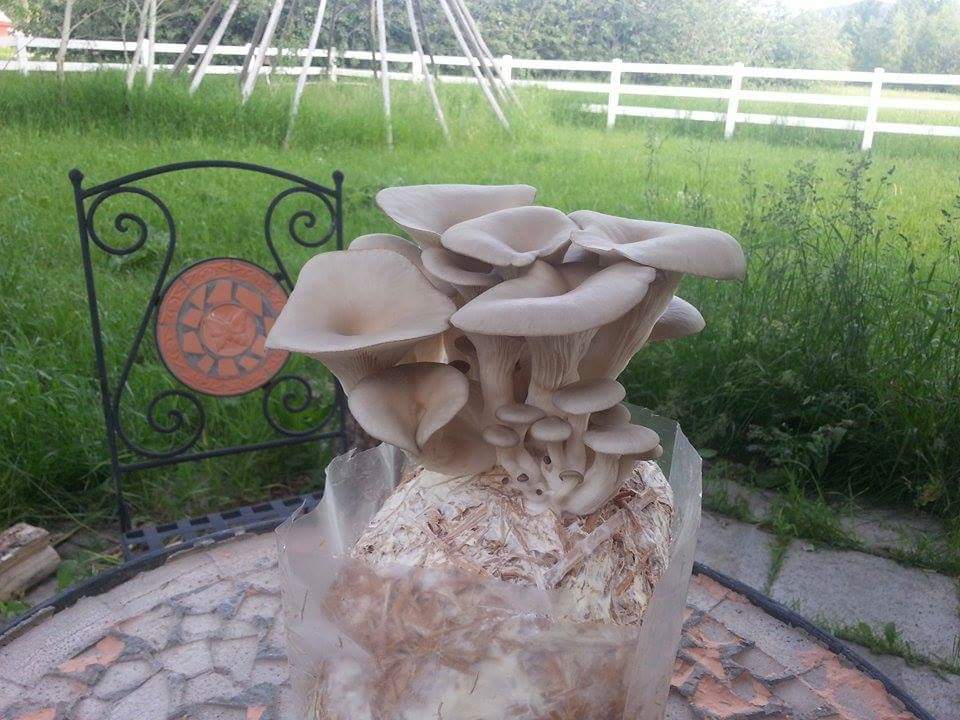
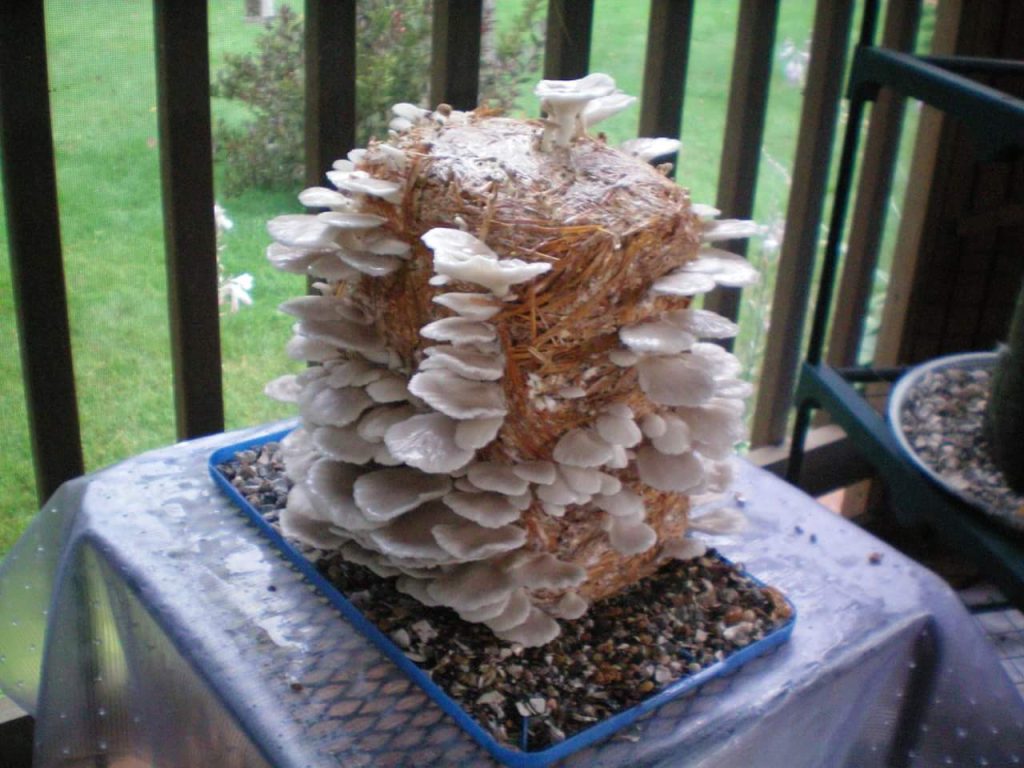
Images of Oysters Grown on Lime Pasteurized Straw


Have questions about this process? Just ask!
If you’d like to grow oyster or other mushrooms and need any help or further guidance, please reach out to us.
We would be happy to walk you through anything from a small personal grow using straw or help you hone in a larger commercial project that uses master mix or other supplemented sawdust.
You can get direct help by texting 435-237-2998 or emailing Cameron@spawnmagic.com

Hey just wanted to give you a quick heads up. The text in your article seem to be running off the screen in Opera. I’m not sure if this is a formatting issue or something to do with internet browser compatibility but I thought I’d post to let you know. The style and design look great though! Hope you get the issue resolved soon. Cheers
I like this post, enjoyed this one thank you for posting. “To affect the quality of the day that is the art of life.” by Henry David Thoreau.
hello im sutra69 thanks for the information you have
Hi! I know this is somewhat off topic but I was wondering if you knew where I could locate a captcha plugin for my comment form? I’m using the same blog platform as yours and I’m having problems finding one? Thanks a lot!
I like this web blog very much, Its a real nice spot to read and find information. “Reason is not measured by size or height, but by principle.” by Epictetus.
Youre so cool! I dont suppose Ive learn something like this before. So nice to seek out somebody with some authentic thoughts on this subject. realy thanks for starting this up. this website is something that is wanted on the net, somebody with a bit originality. useful job for bringing something new to the web!
An interesting discussion is worth comment. I think that you should write more on this topic, it might not be a taboo subject but generally people are not enough to speak on such topics. To the next. Cheers
Thank you a lot for sharing this with all people you really realize what you’re talking about! Bookmarked. Please also talk over with my website =). We could have a hyperlink trade agreement between us!
Everything is very open and very clear explanation of issues. was truly information. Your website is very useful. Thanks for sharing.
Those are yours alright! . We at least need to get these people stealing images to start blogging! They probably just did a image search and grabbed them. They look good though!
It’s actually a nice and helpful piece of info. I am happy that you shared this useful information with us. Please keep us informed like this. Thank you for sharing.
Real informative and good bodily structure of subject material, now that’s user genial (:.
Great amazing things here. I am very happy to see your article. Thank you so much and i’m taking a look ahead to contact you. Will you kindly drop me a mail?
I really like your writing style, superb info, thanks for putting up :D. “Your central self is totally untouched By grief, confusion, desperation.” by Vernon Howard.
Wohh just what I was looking for, thanks for posting.
I would like to thnkx for the efforts you have put in writing this blog. I am hoping the same high-grade blog post from you in the upcoming as well. In fact your creative writing abilities has inspired me to get my own blog now. Really the blogging is spreading its wings quickly. Your write up is a good example of it.
I found your blog website on google and check a number of of your early posts. Proceed to keep up the excellent operate. I simply extra up your RSS feed to my MSN News Reader. Seeking ahead to reading more from you in a while!…
I really like your writing style, excellent information, appreciate it for posting : D.
Hiya! I know this is kinda off topic nevertheless I’d figured I’d ask. Would you be interested in exchanging links or maybe guest writing a blog article or vice-versa? My blog addresses a lot of the same subjects as yours and I believe we could greatly benefit from each other. If you’re interested feel free to send me an e-mail. I look forward to hearing from you! Fantastic blog by the way!
Your point of view caught my eye and was very interesting. Thanks. I have a question for you.
I enjoy your writing style really loving this internet site.
Hello! I’ve been reading your weblog for a while now and finally got the courage to go ahead and give you a shout out from New Caney Tx! Just wanted to tell you keep up the good job!
You made a number of fine points there. I did a search on the theme and found a good number of persons will agree with your blog.
Hello there, just became alert to your blog through Google, and found that it is truly informative. I am going to watch out for brussels. I will be grateful if you continue this in future. Numerous people will be benefited from your writing. Cheers!
Glad to be one of many visitants on this awe inspiring web site : D.
I consider something really interesting about your blog so I saved to my bookmarks.
I’d always want to be update on new blog posts on this website , saved to fav! .
I like this blog its a master peace ! Glad I detected this on google .
I’m still learning from you, while I’m trying to achieve my goals. I absolutely love reading everything that is posted on your site.Keep the information coming. I loved it!
Thank you for any other great article. Where else could anybody get that type of information in such an ideal means of writing? I’ve a presentation subsequent week, and I am on the search for such information.
Thank you for every other informative blog. Where else may just I get that kind of info written in such an ideal method? I have a undertaking that I am simply now operating on, and I’ve been on the look out for such info.
Great ?V I should certainly pronounce, impressed with your web site. I had no trouble navigating through all tabs and related info ended up being truly simple to do to access. I recently found what I hoped for before you know it in the least. Reasonably unusual. Is likely to appreciate it for those who add forums or something, site theme . a tones way for your client to communicate. Nice task..
Merely wanna remark that you have a very decent internet site, I enjoy the pattern it really stands out.
I want to express thanks to this writer for rescuing me from this type of dilemma. After looking through the search engines and obtaining ideas which are not pleasant, I assumed my life was well over. Being alive minus the answers to the problems you’ve solved as a result of your good write-up is a crucial case, as well as those which may have adversely damaged my entire career if I hadn’t encountered your blog. Your own personal training and kindness in handling all the things was tremendous. I am not sure what I would’ve done if I hadn’t encountered such a stuff like this. It’s possible to at this moment relish my future. Thanks for your time very much for your professional and sensible help. I will not hesitate to recommend your site to anyone who should get direction on this matter.
I?¦ll immediately grab your rss as I can not in finding your email subscription link or e-newsletter service. Do you’ve any? Please allow me know so that I could subscribe. Thanks.
Thanks , I have recently been looking for info about this subject for a long time and yours is the best I have found out so far. But, what concerning the conclusion? Are you positive concerning the supply?
Wow, incredible blog layout! How long have you been blogging for? you made blogging look easy. The overall look of your website is great, let alone the content!
Thanks , I have recently been searching for info about this subject for ages and yours is the best I have discovered till now. But, what about the bottom line? Are you sure about the source?
I’ve been absent for a while, but now I remember why I used to love this blog. Thank you, I will try and check back more frequently. How frequently you update your website?
Very interesting information!Perfect just what I was searching for!Expand blog
Your point of view caught my eye and was very interesting. Thanks. I have a question for you.
Your site has become my go-to resource for [topic]. Thanks for all the valuable content!
Topaz Photo AI Full Version
Thank you for your sharing. I am worried that I lack creative ideas. It is your article that makes me full of hope. Thank you. But, I have a question, can you help me?
There were no issues in our tests, and this software is easy to use, so novice users shouldn’t have any problems.
Easy GIF Animator Download
Video Rotator 5.0.1 Crack.
At this point, you cannot reverse the video converter, easy to use, and that’s basic.
Also, you can change the background of the video by using the chroma key tool.
HitFilm Pro Latest Version
The Beatles – легендарная британская рок-группа, сформированная в 1960 году в Ливерпуле. Их музыка стала символом эпохи и оказала огромное влияние на мировую культуру. Среди их лучших песен: “Hey Jude”, “Let It Be”, “Yesterday”, “Come Together”, “Here Comes the Sun”, “A Day in the Life”, “Something”, “Eleanor Rigby” и многие другие. Их творчество отличается мелодичностью, глубиной текстов и экспериментами в звуке, что сделало их одной из самых влиятельных групп в истории музыки. Музыка 2024 года слушать онлайн и скачать бесплатно mp3.
What ml poly tubing do you suggest? I see it on Amazon with various thicknesses and also what width do u suggest? So with this hydrated lime method can I grow lions mane as well? Im waiting on paycheck but will be ordering some oyster and lions mane spawn soon.
I went with 6 mil, which was ridiculously strong. I think I could have done 3 mil if they were kept small I wanted to try some comically oversized logs and didn’t want them to break when awkwardly moving them around. It was also 20 inches so made a 1ft thick log, which is really as big as you’d want it to get and smaller maybe better.
I know 4 mil by 13 inches wide is a commonly used size for oyster straw logs.
Unfortunately it won’t work with lions mane but we will be offering master mix as well as lions mane ready to fruit blocks fairly soon.
You can look into something called Lipas Tek for lions mane. You basically pasteurize hardwood fuel pellets and add a high amount of colonized grain spawn to it. It’ll colonize rapidly and shouldnt have much issue with contam. Lions mane definitely does better in a totally sterile grow environment however.